


Shoply offers an efficient system for managing users and employees with two primary roles: Admins and Sales. This guide will explain how to manage users, define their permissions, and perform individual actions such as updating or deactivating users. Understanding the user roles and permissions is essential for maintaining control over store operations.
What Are Admin and Sales Roles in Shoply?
Shoply provides two key user roles: Admins and Sales.
Admins have full permissions and can access all areas of the system, including product pricing, reports, and store management. They are responsible for overseeing the entire store's operations.
Sales employees have limited access, primarily restricted from viewing cost prices, reports, and other sensitive data. This role is suitable for staff members handling daily sales and transactions.
Managing All Users
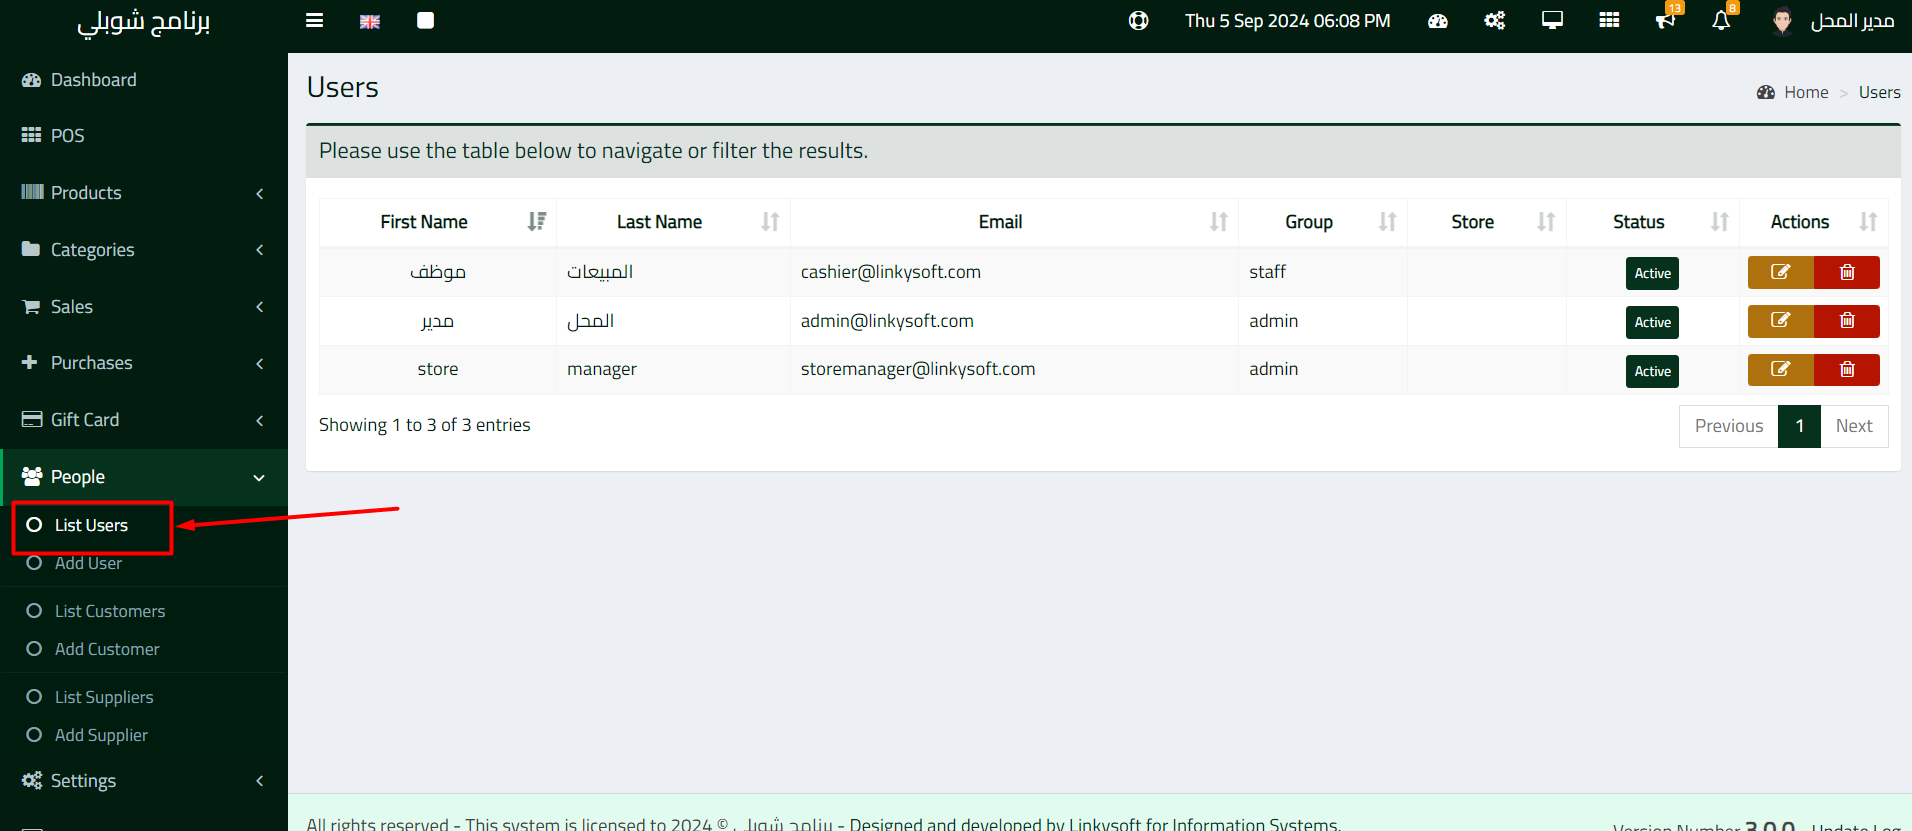
Administrators can manage users by navigating to the People > List Users section. Here, you can view all users, edit their details, and perform actions such as activating or deactivating accounts.
Steps to Manage Users
1. Go to People > List Users.
2. A table of users will be displayed with their respective names, roles, stores, and statuses.
3. From this table, you can edit or deactivate users using the individual action buttons in the "Actions" column.
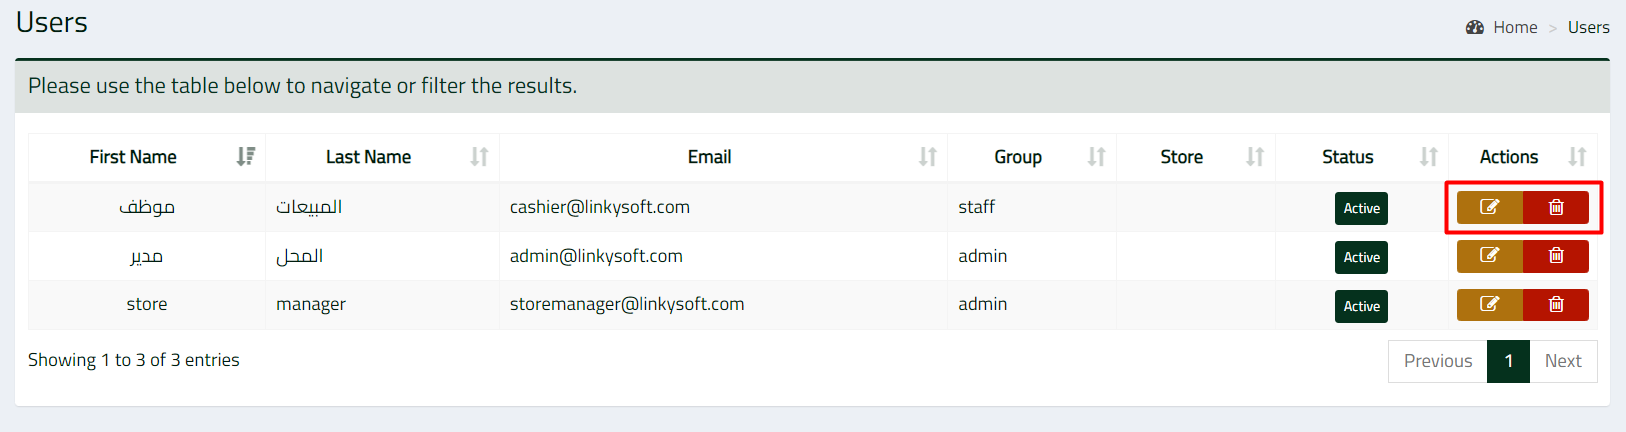
Individual User Actions
For each user, you can perform the following actions:
1. Edit their details to update information such as their name, email, and role.
2. Change their Status to either "Active" or "Inactive" depending on whether they should have access to the system.
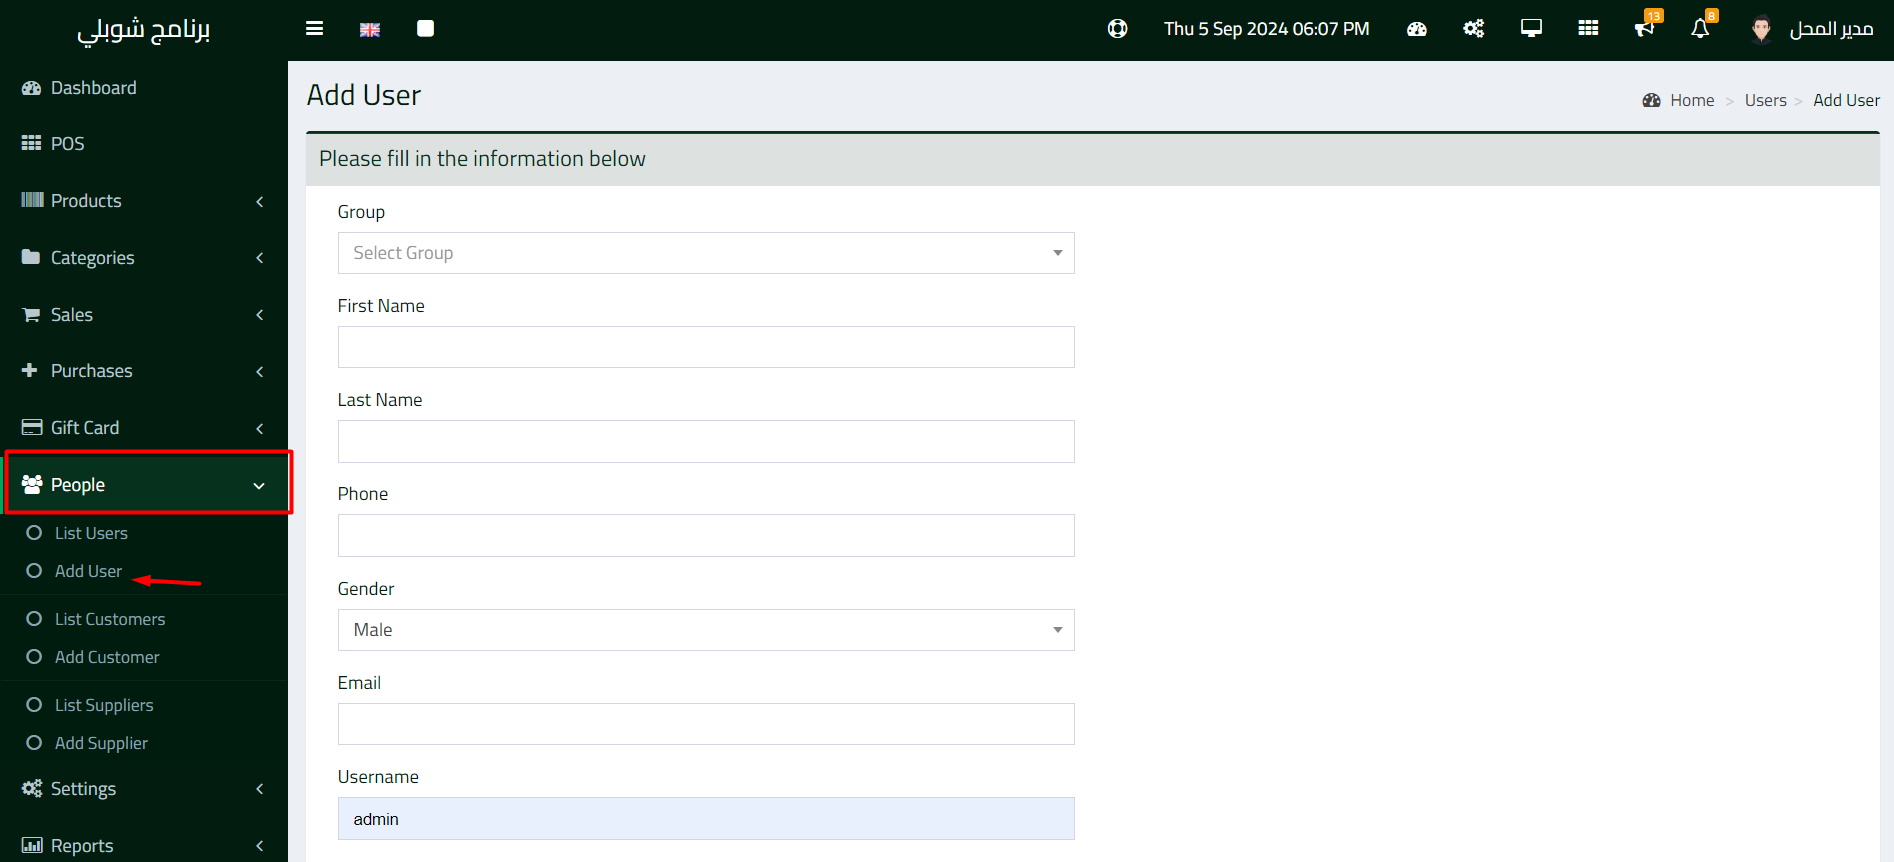
Creating New Users
When adding a new user, you can define their role, status, and store association. You can also choose to send them an email notification upon creation.
Steps to Add a New User
1. Go to People > Add User.
2. Fill in the user details such as First Name, Last Name, Email, and Phone.
3. Select their role from the Group dropdown (either Admin or Sales).
4. Set their status to Active or Inactive depending on whether they should have immediate access to the system.
5. Choose the store or warehouse to which the user will be linked. This limits their access to data related to that specific store or warehouse.
6. If you'd like to notify the user of their account creation, check the Notify User by Email option before saving.
7. Once all details are filled, click Add User.
Proper management of users and employees in Shoply ensures that your team has access to the necessary functions while keeping sensitive information secure. This tutorial has covered essential tasks like managing user roles, updating individual user details, and assigning store-specific permissions, ensuring smooth operations within your business.

