

A ticket is a message you write to our support team. It starts a conversation that stays saved in your account, along with every reply. In this guide you open a ticket from your control panel in 8 steps, so your message reaches the right department and you can follow the answer in one place.
Before you start.
Have your account's e-mail address and password ready, along with a short description of what happened. If you have a picture of the problem or a file that explains it, keep it close so you can attach it to the ticket.
Already signed in? This button takes you straight to the ticket form, so you start from step 4.
Open a ticket1. Open the sign-in page and sign in to your account
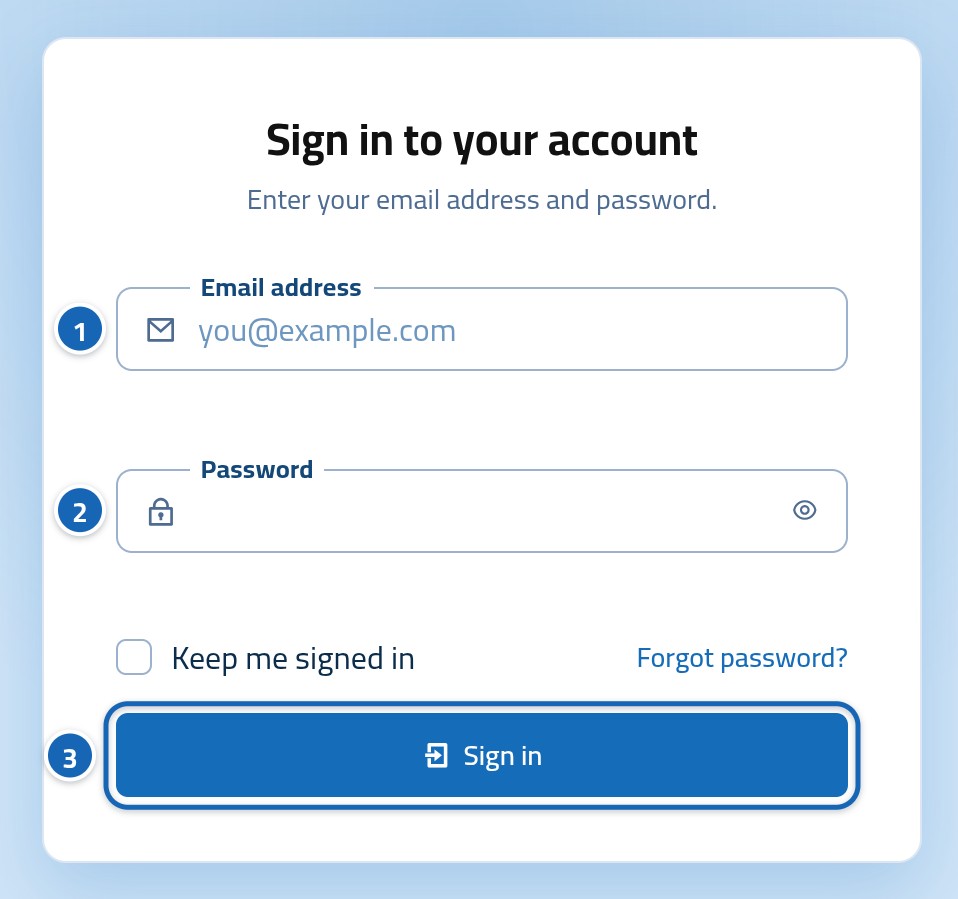
Open the sign-in page. You see a card with two fields. Type your e-mail address (1) and your password (2), then press the “Sign in” button (3).
Done.
You are now in your control panel, the main page of your account, with the side menu beside it.
2. Press “Tickets” in the side menu
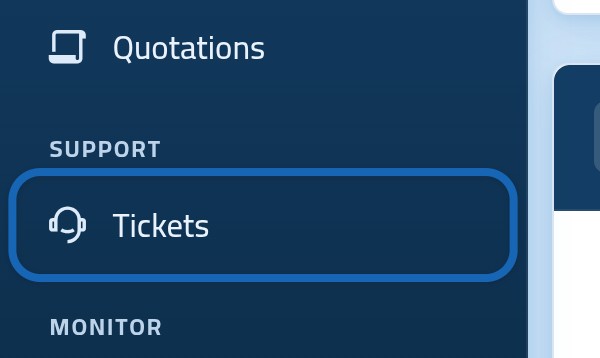
Find the “Support” group in the side menu, then press “Tickets” under it. If you do not see the menu, press the button that shows it at the top of the page.
3. Press “New ticket”
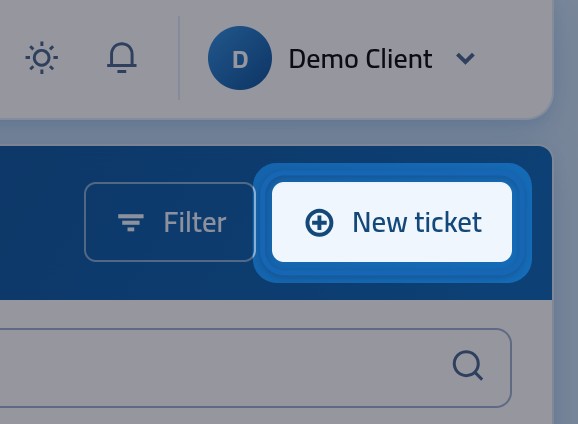
The “Support tickets” page opens, with all your conversations with the support team. If this is your first ticket, the table is empty and says “No tickets yet”. Press the “New ticket” button at the top of the page.
4. Choose the department that fits your problem
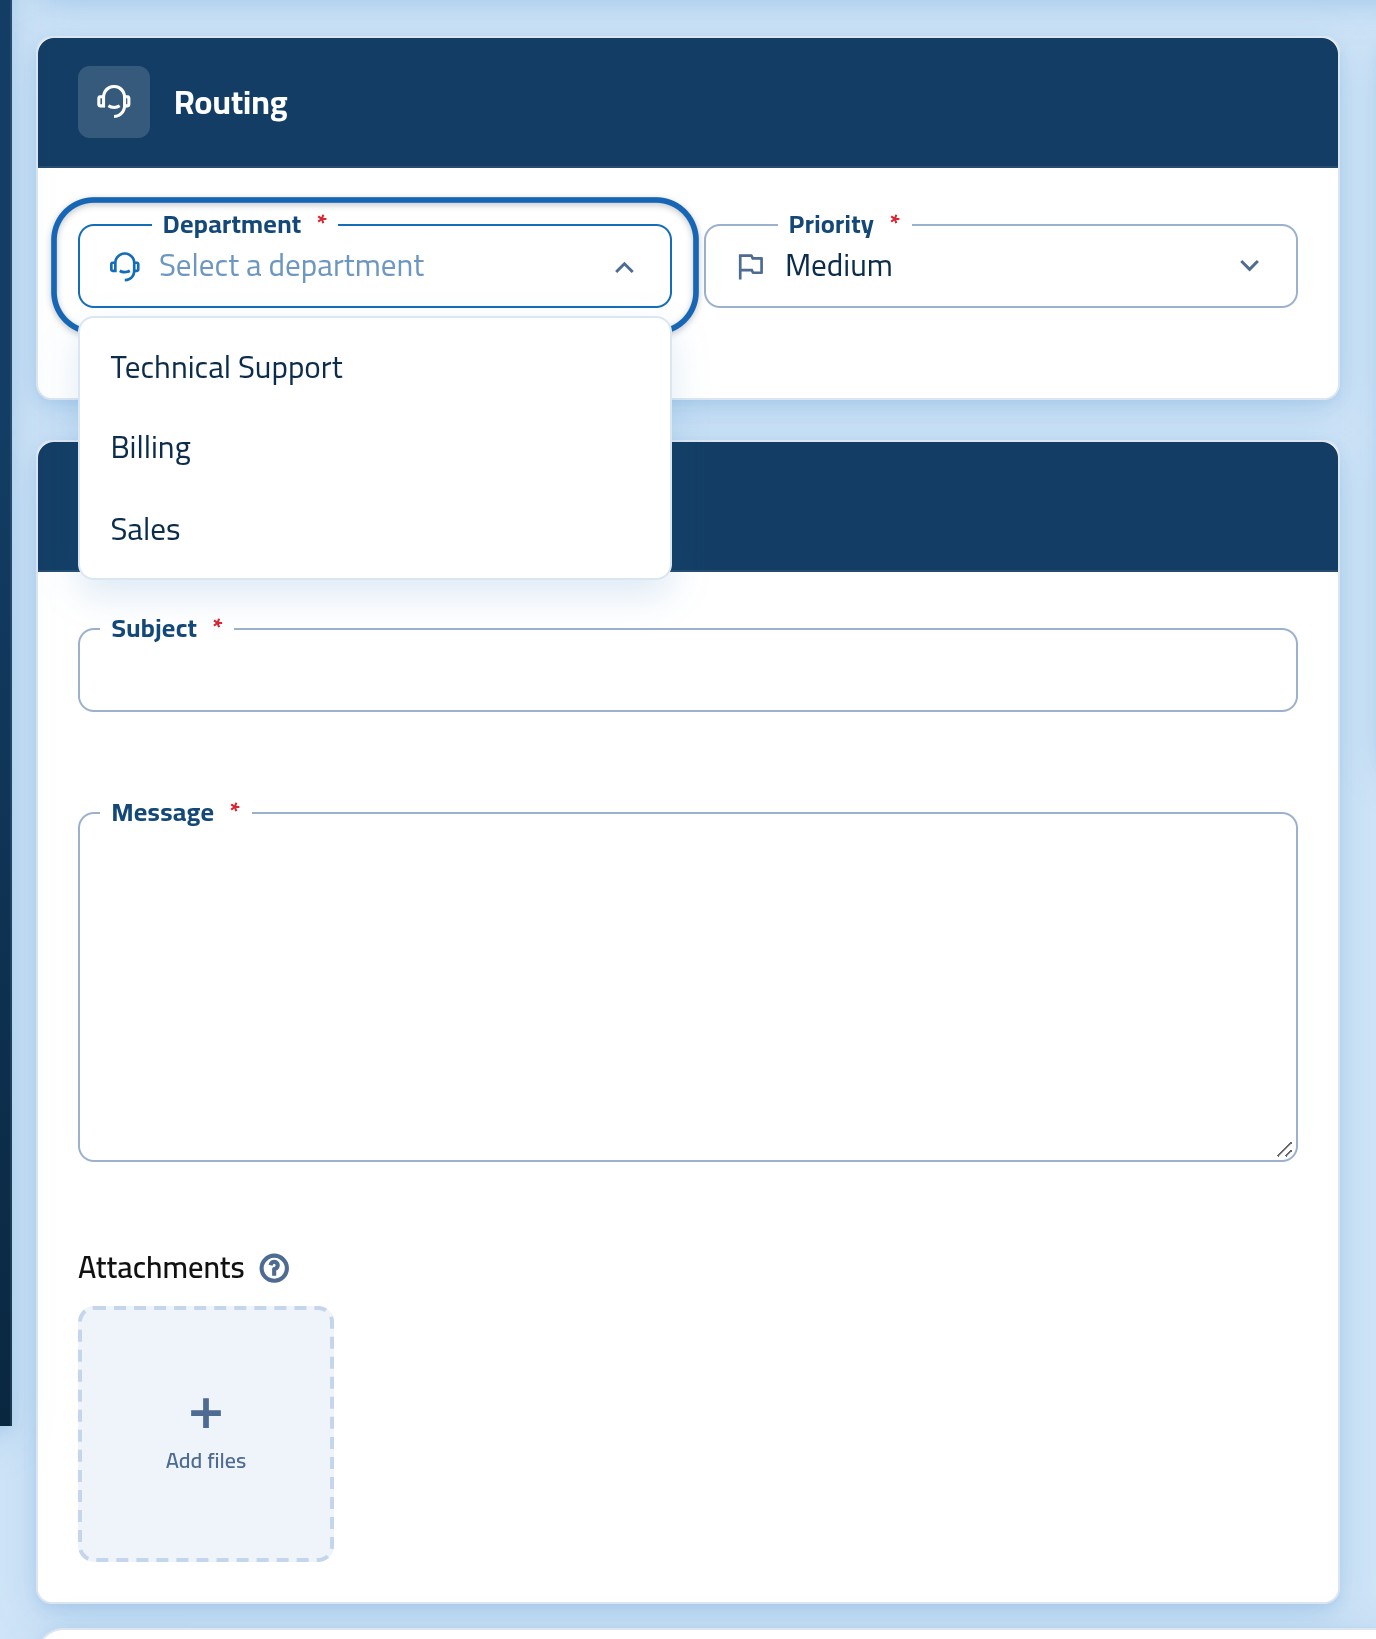
The “Open a ticket” page opens. In the “Routing” card you decide who receives your message. Press the “Department” field, then choose the closest match from the list that appears, such as “Technical Support”, “Billing” or “Sales”.
5. Set your ticket's priority
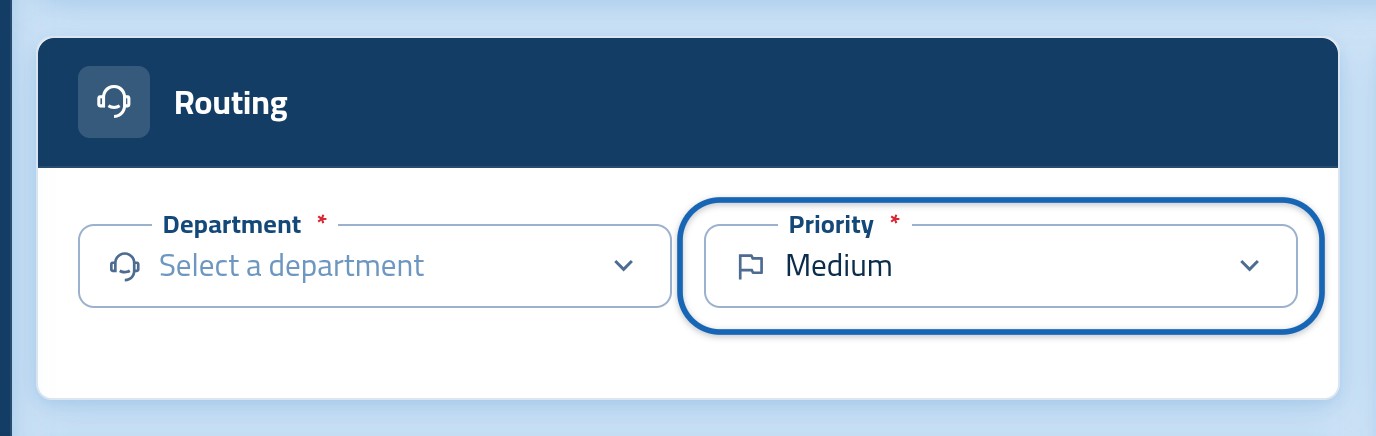
The priority tells the support team how urgent your problem is. The “Priority” field starts on “Medium”, so leave it as it is if that fits. To change it, press the field and choose “Low”, “High” or “Urgent”.
The “Which service is this about?” field.
If you have services in your account, such as your site's hosting or its address (the domain), you see this field under the priority. It does not appear in the picture. Press it and choose the service your problem concerns, because naming it gets your ticket to the right person faster. If your question is general, leave it as it is.
6. Type the subject and your message
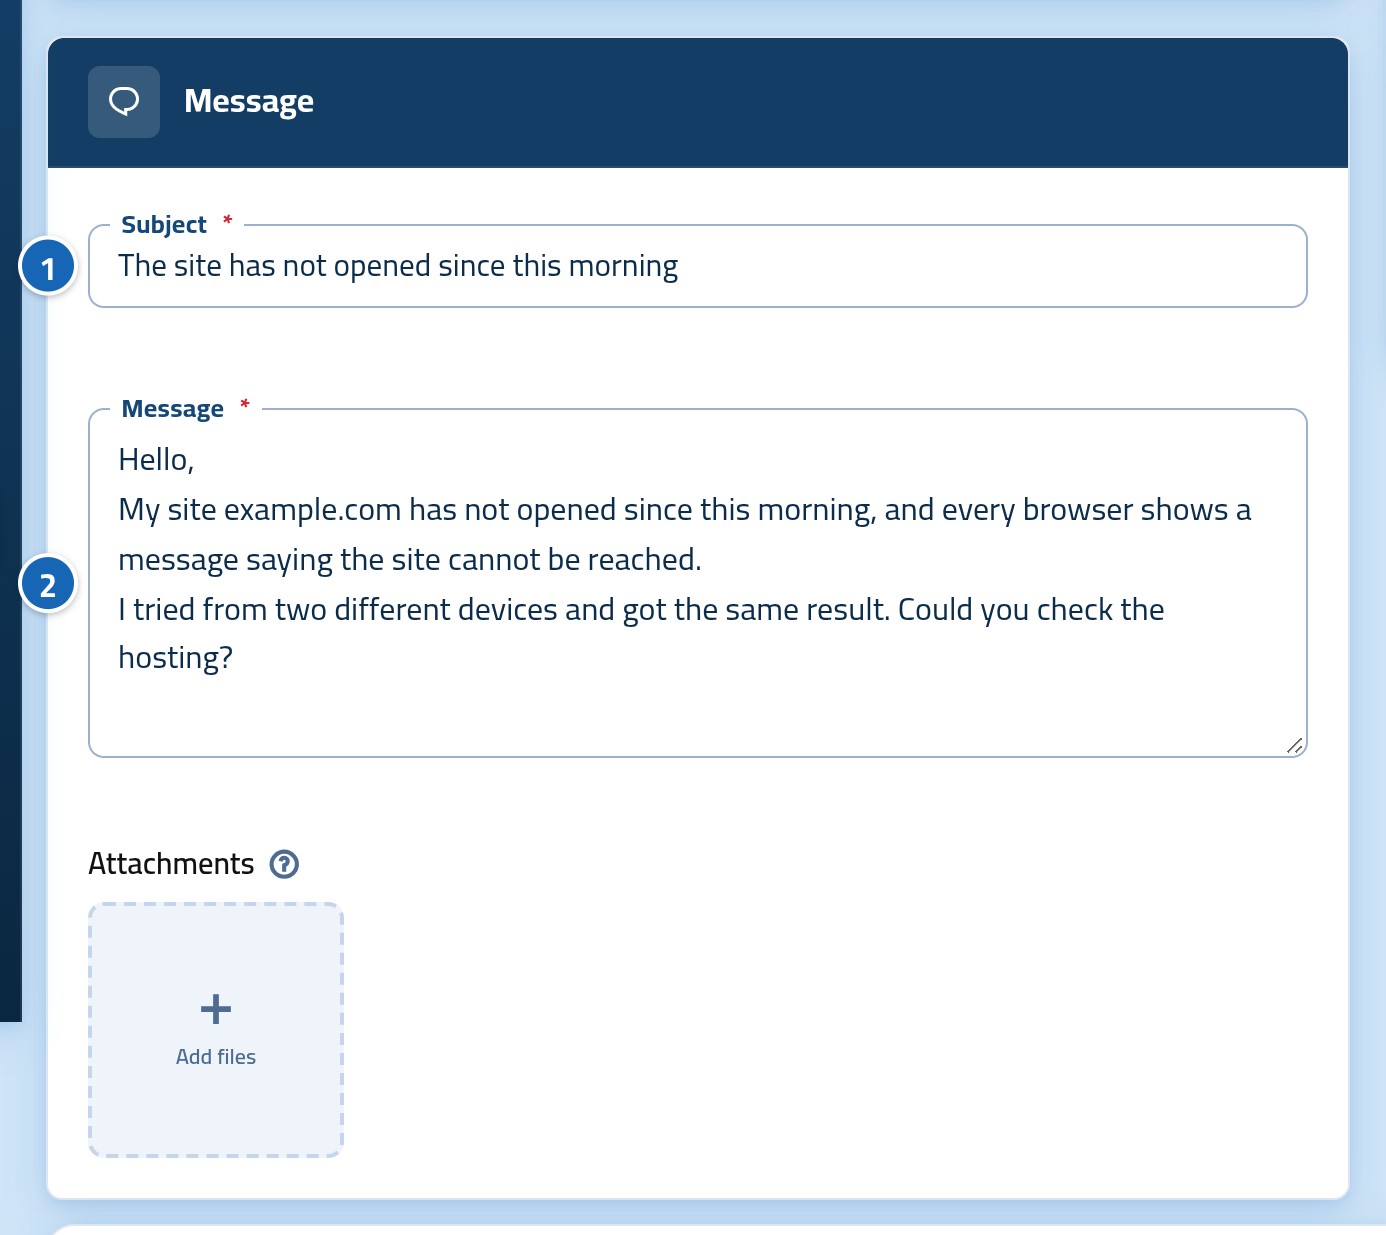
In the “Message” card, type one short sentence that sums up the problem in the “Subject” field (1). Then explain in the “Message” field (2) what happened, when it happened and what you tried, and copy the text of any error message you saw. The clearer your explanation, the easier it is for the team to help you.
7. Attach a file if it explains the problem
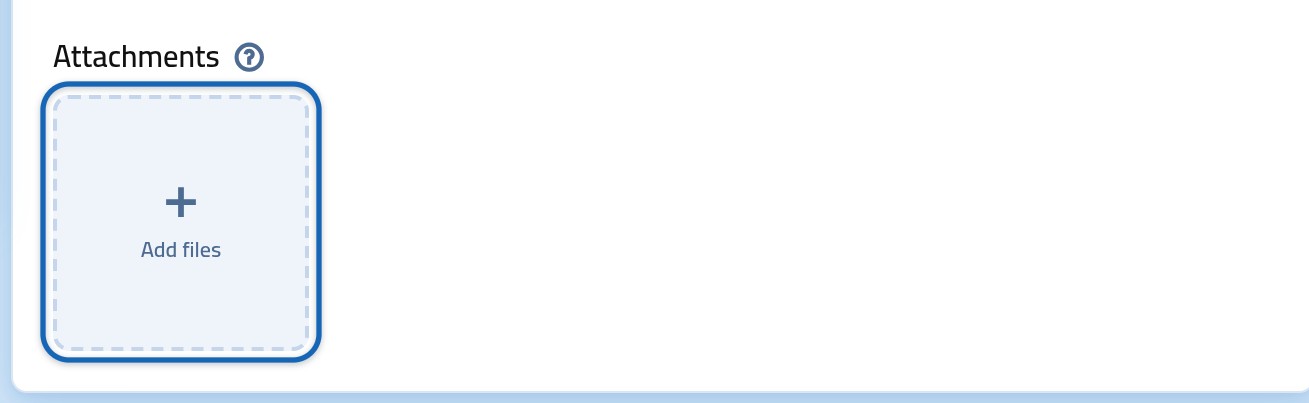
This step is optional, so skip it if you have nothing to attach. Press the “Add files” box and choose the file from your device. The file appears in a box, with a new box beside it for adding another. You can attach up to 5 files, each up to 10 MB.
Wait until the file finishes uploading.
Each file starts copying from your device to our servers as soon as you choose it. If you press “Open ticket” before that finishes, the ticket is not sent and you see the message “Please wait for the upload to finish.”
8. Press “Open ticket”
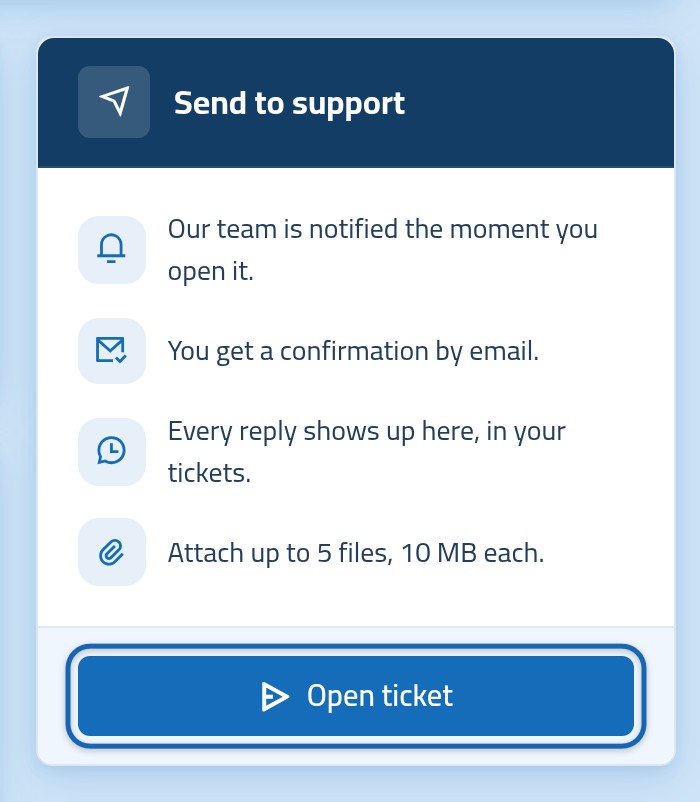
Check what you wrote, then press the “Open ticket” button in the “Send to support” card. The same card tells you what happens next: our team is notified, and you get a confirmation by e-mail.
Done.
A message tells you the ticket is open and gives its reference, a code that sets it apart from your other tickets, such as tkt-1234-5678. You then move to the ticket's page, and a confirmation reaches your e-mail.
What happens after you open the ticket?
The ticket's page holds the whole conversation. At the top is your ticket's subject, and under it its reference, status, priority and department. Press the reference if you want to copy it. Under your message you see “Waiting for our team” until the first reply arrives.
When the team answers, the reply appears on the same page without you reloading it, and a message reaches your e-mail. To continue the conversation, type in the “Your reply” field, then press “Send reply”. You can come back to your ticket at any time from the “Tickets” page.
| The status you see | What it means |
|---|---|
| Open | You opened the ticket, and the team has not answered yet. |
| Answered | The support team has answered, so read the reply and continue if you need to. |
| Awaiting reply | You replied, and it is now the support team's turn. |
| On Hold | The support team has paused the ticket for now. |
| Closed | The conversation is over. |
A closed ticket takes no replies.
Once a ticket is closed, whether by you or by the support team, you cannot write in it. If you need more help, open a new ticket.
If something does not work as you expect
| What you see | What to do |
|---|---|
| “This field is required.” | One of the fields with a star (*) is empty. Fill in the department, priority, subject and message, then press “Open ticket” again. |
| “Please wait for the upload to finish.” | One of your files is still uploading from your device. Wait until it finishes, then press the button again. |
| A file is not accepted | Check that it is no larger than 10 MB, that its type is one of the allowed types, and that you have no more than 5 files. |
| “Your account can't open tickets right now. Please contact us.” | Your account cannot open tickets at the moment. Write to us from the Contact Us page. |
| You cannot find your service in the field, or a ticket in the table | Look at the box under the logo in the side menu and check that it is set to “All businesses”, because choosing one of your businesses shows only what belongs to it. A cancelled service does not appear in the field. |
How many files can I attach to a ticket?
You can attach up to 5 files, each up to 10 MB. A ticket accepts pictures in JPG, PNG, WEBP and GIF, PDF, Word and Excel files, ZIP and RAR archives, and TXT, LOG and CSV text files.
How do I know the support team has replied?
A message reaches your e-mail, and the reply appears on the ticket's page. If the page is open in front of you, the reply appears on it without you reloading it.
Can I reply to a closed ticket?
No, a closed ticket takes no replies. Open a new ticket, and the team will pick it up with you.
How do I close a ticket once the problem is solved?
Open the ticket's page, then press “Close ticket” at the foot of the “Ticket details” card. A confirmation window appears, so press “Close ticket” in it as well, and a confirmation reaches your e-mail.
Is there another way to open a ticket?
Yes. When you are signed in, the AI assistant on our site can open the ticket for you: you tell it your problem, and it writes the subject and the message and chooses the department and priority. It cannot attach files, so use the form if you need to. There is also an “Open a Ticket” link at the foot of the control panel's pages.
Questions and answers
How many files can I attach to a ticket?
You can attach up to 5 files, each up to 10 MB. A ticket accepts pictures in JPG, PNG, WEBP and GIF, PDF, Word and Excel files, ZIP and RAR archives, and TXT, LOG and CSV text files.
How do I know the support team has replied?
A message reaches your e-mail, and the reply appears on the ticket's page. If the page is open in front of you, the reply appears on it without you reloading it.
Can I reply to a closed ticket?
No, a closed ticket takes no replies. Open a new ticket, and the team will pick it up with you.
How do I close a ticket once the problem is solved?
Open the ticket's page, then press “Close ticket” at the foot of the “Ticket details” card. A confirmation window appears, so press “Close ticket” in it as well, and a confirmation reaches your e-mail.
Is there another way to open a ticket?
Yes. When you are signed in, the AI assistant on our site can open the ticket for you: you tell it your problem, and it writes the subject and the message and chooses the department and priority. It cannot attach files, so use the form if you need to. There is also an “Open a Ticket” link at the foot of the control panel's pages.